Making your Network Topology come to (virtual) life with drawthe.net and gns3fy
Intro
Hi, if you were following the previous articles you will realise that they are focused on network lab virtualization, more specifically in how they can be automated. In this article I cover an interesting topic, the creation of a network topology in GNS3 from an external source in a programmatic way, so let's dive in.
I was evaluating options to consume network topology data and use it to dynamically to create GNS3 labs when I stumbled upon drawthe.net.
It checks most of the requirements needed to leverage the methods in gns3fy to create a network topology; and if you add some extra fields relevant to GNS3, you can fully create a network lab environment from the topology YAML file.
So, in order to test this functionality I wrote this python script -> GitHub - davidban77/drawthenet_converter: Reads http://go.drawthe.net YAML files and recreates a GNS3 topology.
Topology file: drawthe.net
For those of you who don’t know about drawthe.net, it is a tool that renders a full-blown diagram from a YAML file. The Github repository explains the structure of the YAML file and the available options and fields you have available.
There are 2 main sections of the file, besides the title, that we need to build our topology in GNS3.
Icons
The icons section is where all the devices and icons reside. The name of the icons (i.e. device name) is set as the keys of the data structure, and the properties are the values.
From the properties of each device we care about the coordinates (x and y), to specify the device location in the canvas.
We also need to specify a new property (gns3_template) to be able to map the device with an available device template in your GNS3 server.
Note: Is important to highlight that the script is not yet able to support the coordinates in the form of “+1” or “-1”, since it seems to rely on the value of a previous coordinate. This seemed like an unnecessary complication for the moment.
Connections
The other section is the connections. Which is a list of dictionaries that specify the properties on a link.
The property we need is endpoints. A list of 2 strings that specifies the endpoints of a link. This has the following format:
[<device-A>:<port-A>,<device-B>:<port-B>]
Note: Although the drawthe.net YAML files support the endpoints to connect to groups, this will not be supported by the script. This is not reproducible in GNS3.
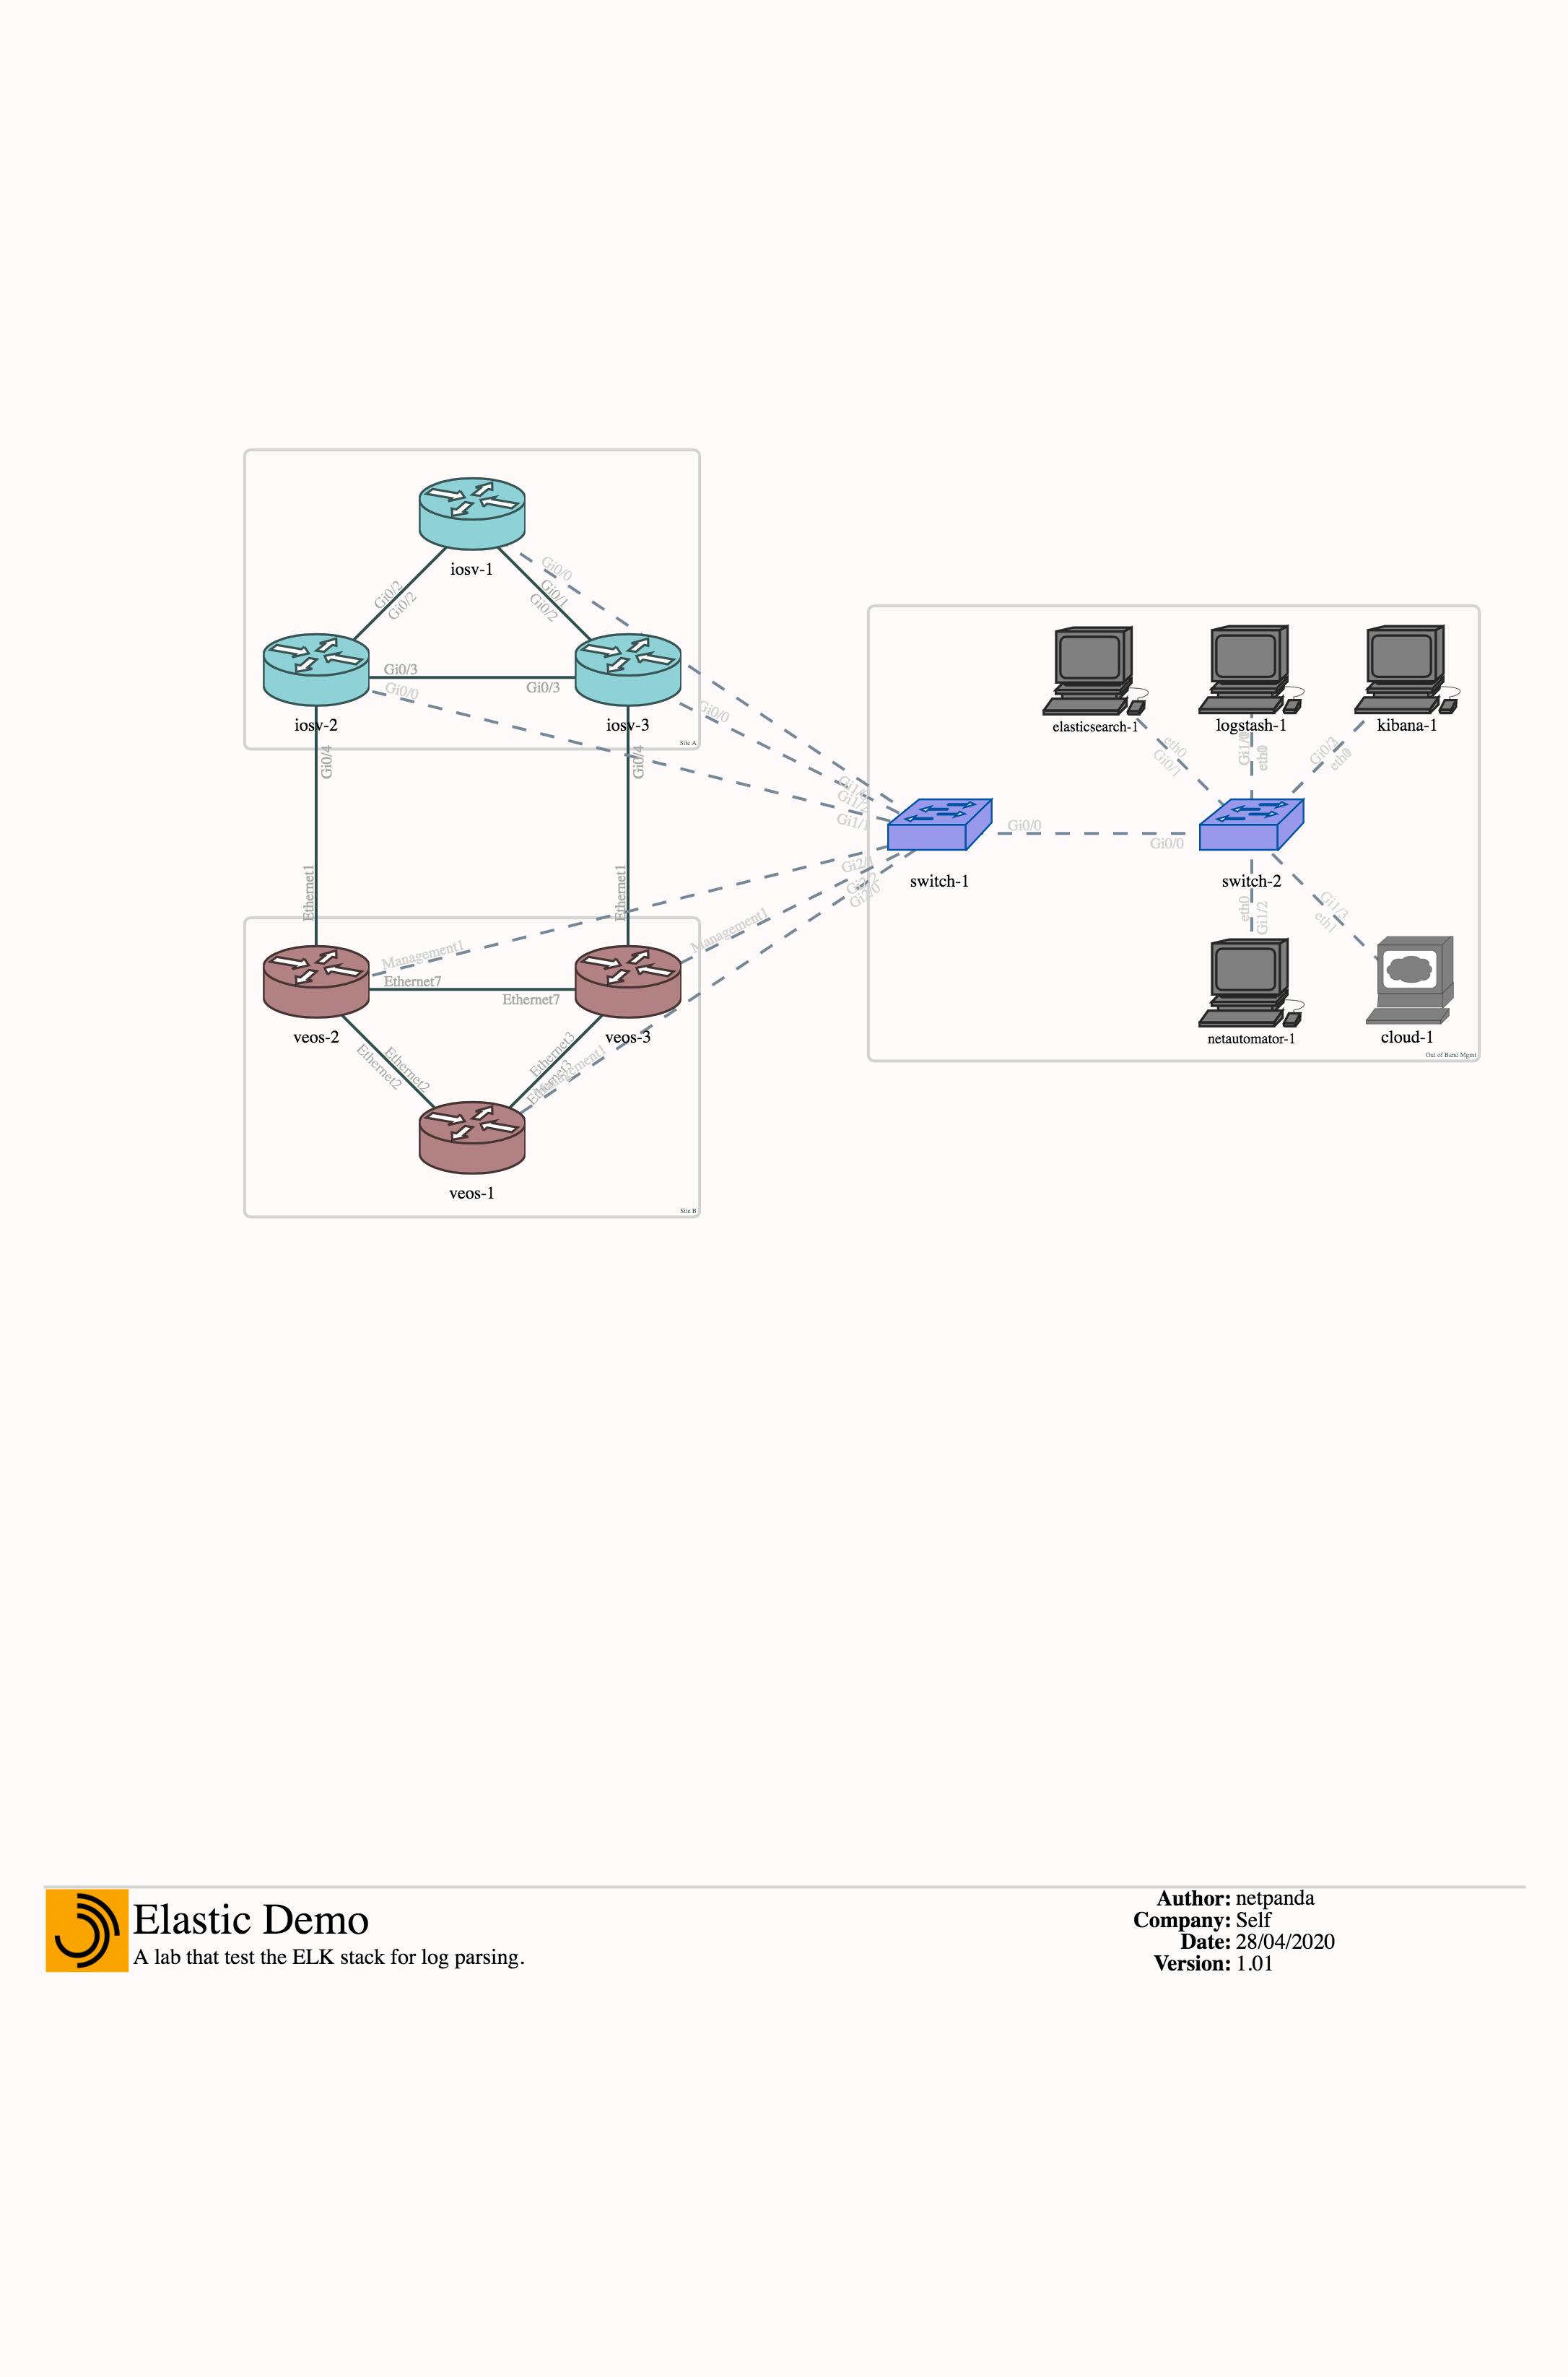
As an example, the topology to be replicated in GNS3 is specified in examples/elk_demo_topology.yml, which can found in the repository. The following image shows how is rendered in drawthe.net:

Python script
The script goes through this workflow:
- Reads the drawthe.net YAML file.
- Parses and extracts the nodes and links information.
- Creates the lab.
- Creates the nodes and applies some multipliers to the coordinates so they can fit properly in the GNS3 canvas.
- Creates the links.
The script can be found here.
Extracting topology information
Data is read and parsed from the topology file and with the following functions the nodes and links are extracted:
def get_nodes_spec(icons_data):
    """
    Parses the `icons` section from the drawthe.net YAML file to get the device
    information.

    The keys each device defined in the section must have:

    - `gns3_template`: Name of the GNS3 template where the device will be mapped into.
    - `x`: The `x` coordinate value.
    - `y`: The `y` coordinate value.

    NOTE: The coordinates DO NOT SUPPORT the `+1` or `-1` reference values that are
    available on drawthe.net
    """
    try:
        return [
            dict(
                name=device,
                template=params["gns3_template"],
                x=params["x"],
                y=params["y"],
            )
            for device, params in icons_data.items()
        ]
    except KeyError as err:
        raise ValueError(
            f"Parameter could not be found in the YAML icons section: {err}"
        )


def get_links_spec(connections_data):
    """
    Parses the `connections` section from the drawthe.net YAML file to get the links
    information.

    Each entry must have the following key:

    - `endpoints`: List of link specification with the devices and port separated by `:`

    [<device_A>:<port_A>, <device_B>:<port_B>]
    """
    try:
        return [
            connection["endpoints"][0].split(":")
            + connection["endpoints"][-1].split(":")
            for connection in connections_data
        ]
    except Exception as err:
        raise ValueError(f"{err}\nCould not parse the links on the connection section")
So, assuming the YAML data has been parsed and stored in topology_data, the nodes and links can be retrieved like the following:
# Collect the lab name
lab_name = topology_data["title"]["text"]

# Collect nodes specs
nodes_spec = get_nodes_spec(topology_data["icons"])

# Collect connections specs
links_spec = get_links_spec(topology_data["connections"])
Creating the project, nodes and links
With data parsed and verifying that the required parameters are set and found, the gns3fy library can be used to create the network topology.
Here is the snippet of the creation of the GNS3 project, the nodes and the links.
# Create Gns3Connector
server = Gns3Connector(f"{args.protocol}://{args.server}:{args.port}")

# Create the lab
lab = Project(name=lab_name, connector=server)
lab.create()

# Create the nodes
for device in nodes_spec:
    node = Node(
        project_id=lab.project_id,
        connector=server,
        name=device["name"],
        template=device["template"],
        x=parsed_x(device["x"] - 10),
        y=parsed_y(device["y"] - 5),
    )
    node.create()
    time.sleep(3)

# Create the links
for link in links_spec:
    lab.create_link(*link)
Note: The parsed_x and parsed_y are functions that better accommodate the device in the topology canvas.
Using the script
Now that the main sections of the script are covered. Here is how you would use it:
- First download the repository or fork it if you want to have your own data.
- Locate and go the the parent directory where the
drawthenet_converter.pyresides. - Using the example topology of
elk_demo_topology.ymland the servergns3vmperform the recreation of the lab.
python drawthenet_converter.py --topology examples/elk_demo_topology.yml --server gns3vm

###################### Collecting topology data ######################

The lab name would be: Elastic Demo

################### Configuring lab on GNS3 server ###################


Lab already created, do you want to delete it? (y/n): y
Project created: Elastic Demo

Device created: iosv-1
Device created: iosv-2
Device created: iosv-3
Device created: veos-2
Device created: veos-3
Device created: veos-1
...
<Output omitted>
...
########################### Links Summary ############################

Device A         Port A       Device B    Port B
---------------  -----------  ----------  ---------
iosv-1           Gi0/1        iosv-3      Gi0/2
iosv-1           Gi0/2        iosv-2      Gi0/2
iosv-2           Gi0/3        iosv-3      Gi0/3
iosv-2           Gi0/4        veos-2      Ethernet1
iosv-3           Gi0/4        veos-3      Ethernet1
veos-3           Ethernet7    veos-2      Ethernet7
...
<Rest of the output omitted>
Final result
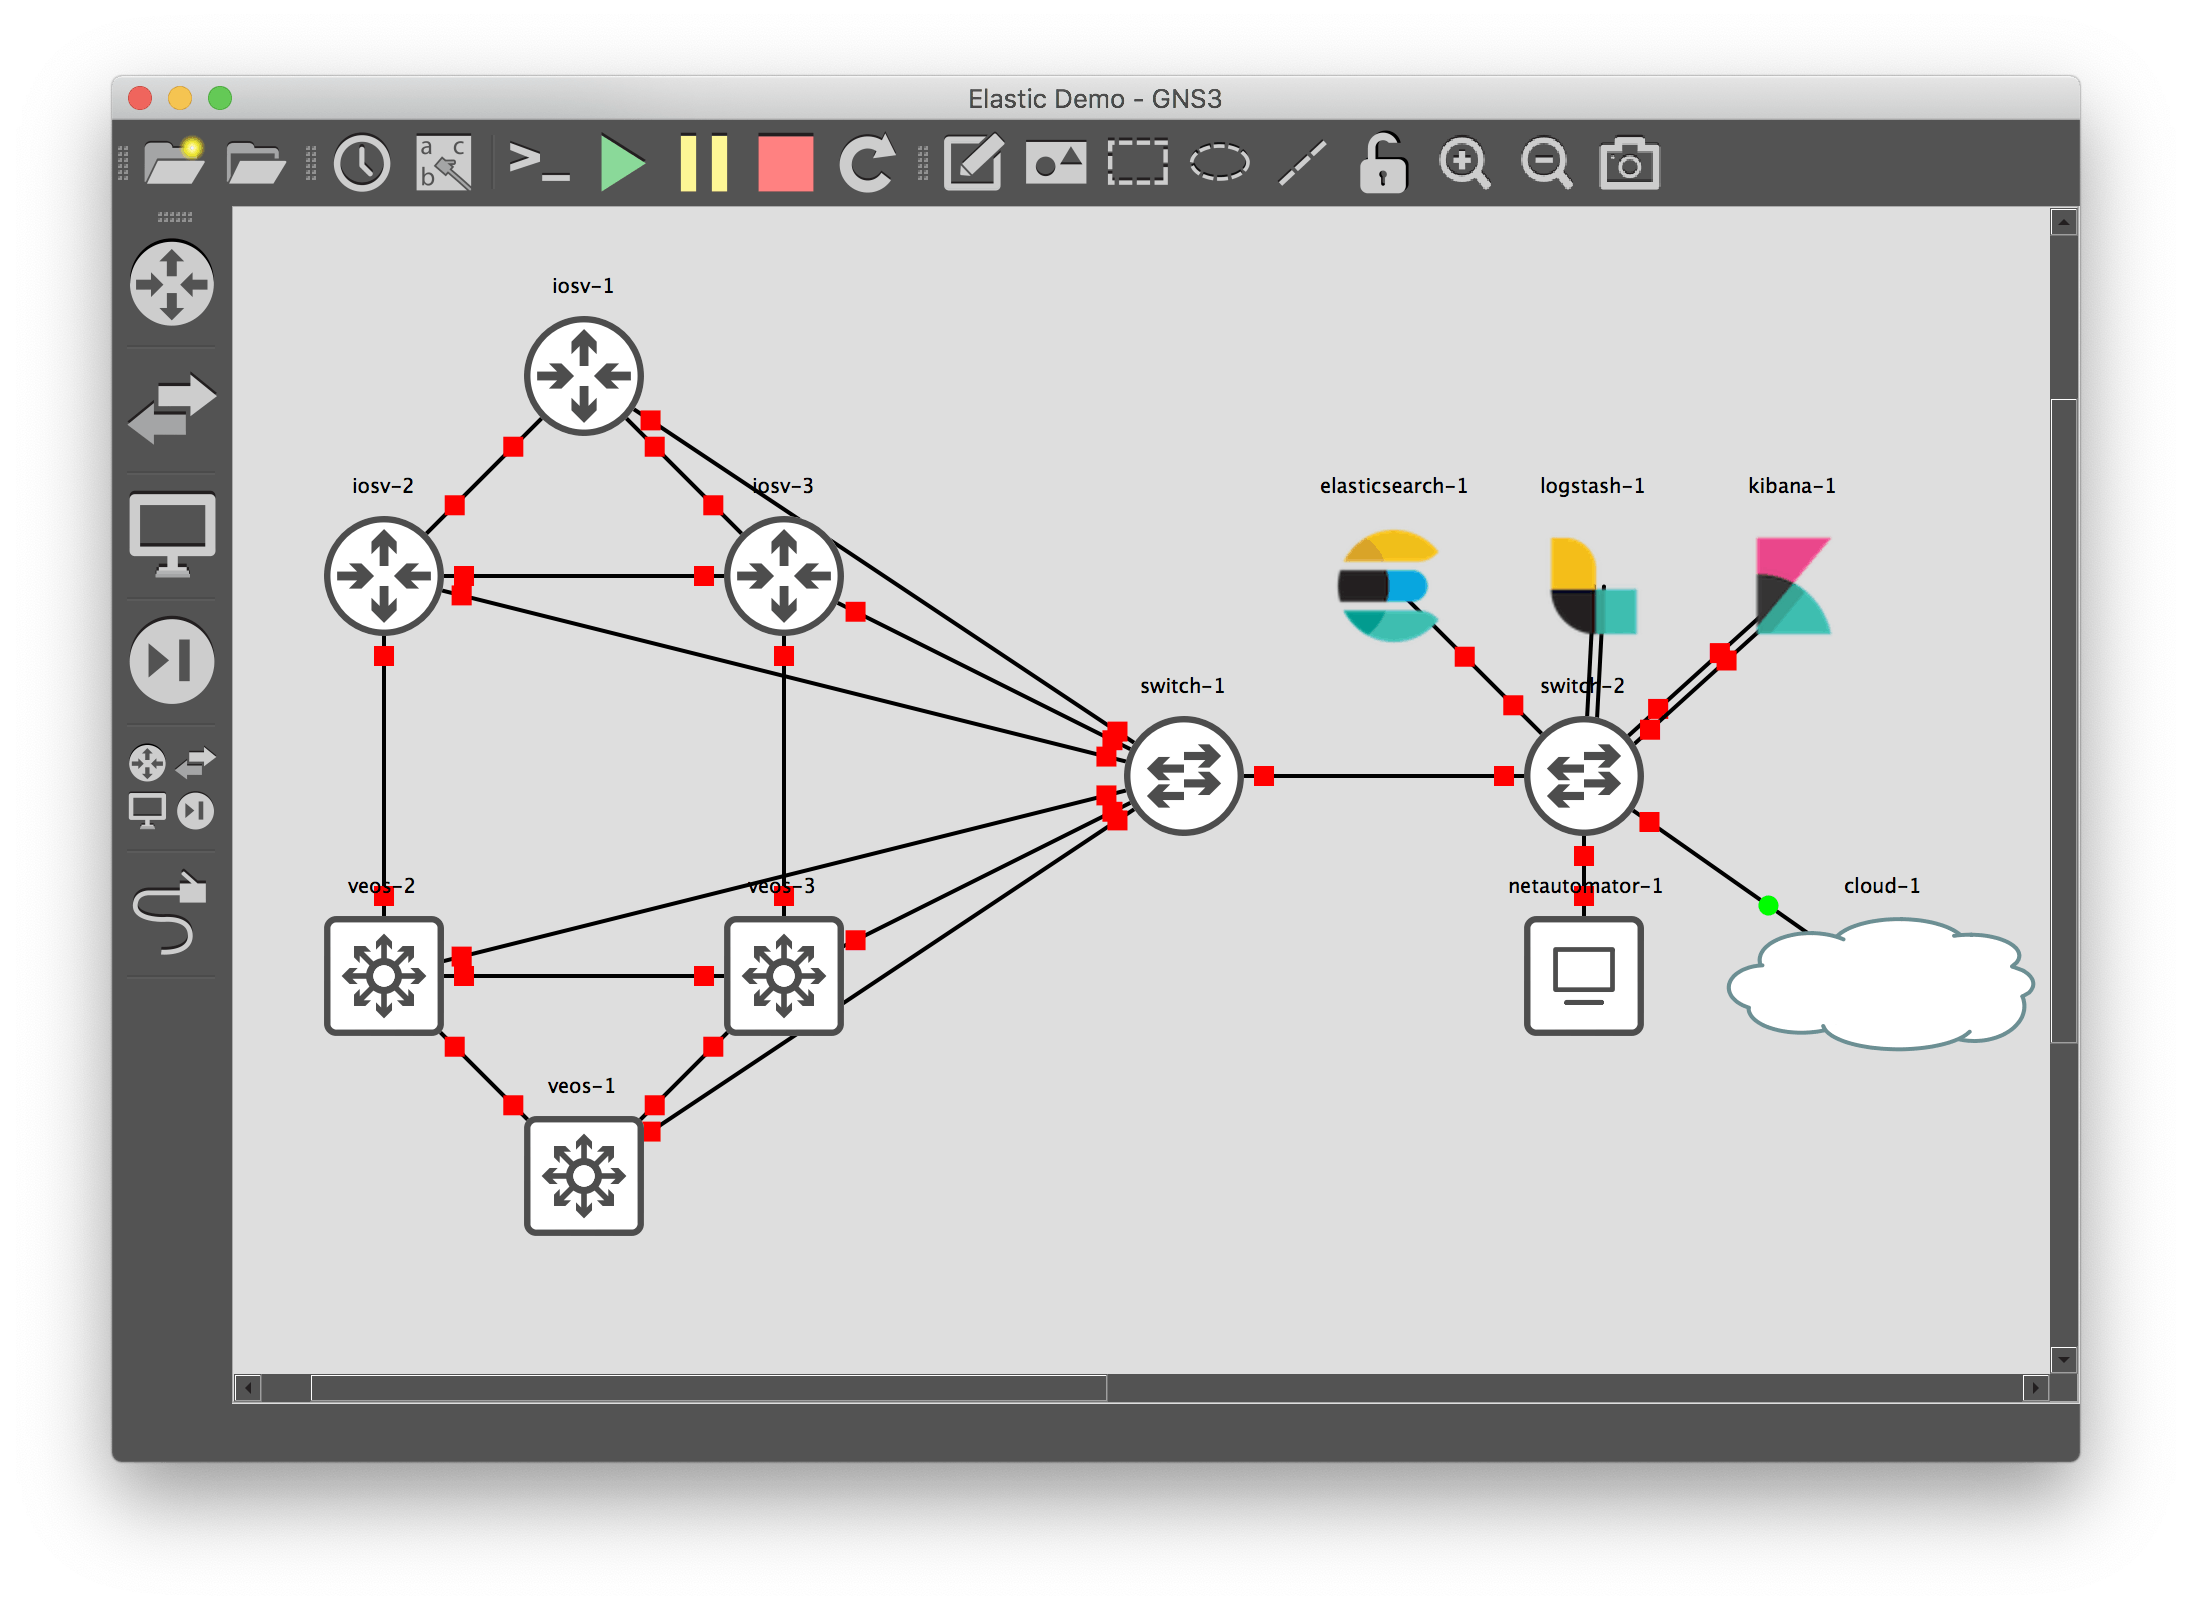
Here is the result of running the script using the elk_demo_topology.yml

You can replicate it yourself, just make sure to verify the templates you have available and the port naming for the links.
Final thoughts
This article was mainly to show you the flexibility you have using Python and gns3fy to create your lab from a source like drawthe.net, the next article will be focused on Ansible and a possible inventory plugin that will be available to leverage drawthe.net files directly from Ansible.
